Mouse Parts and Assembly
1. Middle housing:
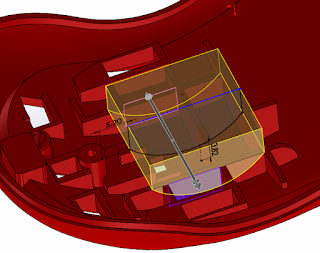
When I was doing this rib I had problem using cut with surface tool. I created boss extrude and wanted to cut the curve but it failed so I change the boss extrude to surface extrude but it failed as well.
So I extrude cut from the middle plane instead and it worked.
The middle housing is the first part I did. I was too OCD about putting all features from real mouse onto the model. Later I realized some features are not necessary because it doesn't interact with other parts in the assembly, and also I do not have the time to make my model perfectly accurate.
2. Battery cover
After thicken, extruding surface and cut the sides, one face was missing and you can see through the part but this is a solid.... weird. It appears the same when I open the file in other computer as well.
I couldn't fill surface because the boundary is not straight lines and there is a weird curve in the filled surface. I tried offsetting the cut surface in for about 0.2mm but this would create a cutted L shape on the cover which is visible on the mouse assembly (forget to save a photo for this)
In the end I redid the battery cover and somehow it doesn't have the same problem. hooray.
3. Bottom housing
There is a round cut out next to where the usb should be, I tried using loft cut to do that and it worked, but I changed the dimensions and position then it says couldn't cut because it will produce self intersecting geometry no matter how I modify the sketch. So I used a revolve cut instead.
There is 2 Z shape cut at the back for the battery cover to slide in, but I only managed to get the one on the left to look real. There is too much feature to cut for the one on the right to get it look correct.
I also realized somehow the bottom housing has different height of cuts on left and right (where the battery cover slides in)
The battery cover tab on the right is under the bottom housing, so cutting a hole for the tab to slide in would be pointless. And editing the middle housing at this point would create too much trouble and I do not have time to edit all the failed features.
Obviously these are just 3% of all the problems I faced in solidworks and there is always something to learn in each problems/ mistakes. Its important to have good problem solving skills and know that there is hundreds of ways to use the different tools to do what you want to achieve.


Comments
Post a Comment