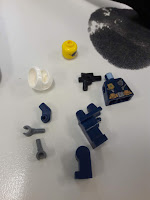
Posts

Showing posts from September, 2018

Lego man's left leg

Image
1: extruding a cylinder 2. Extruding the lower part (slightly longer than the cylinder) 3: Because the right side is at an angle, I thought I could extrude cut a triangular shape from the top but I couldn't figure out how. So I drew the triangle on the side instead and it worked. I also extrude cut a rectangle on another side. 4: Extrude cut a square at the bottom 5: Extrude cut a square from the bottom face in step 4. 6: Extrude cut a hole at the back 7: extrude cut another hole from the back 8: Cutting a rectangle from the circle in step 7 9: adding fillet to the rectangle ( because it is impossible to measure that radius so I just guessed the dimension with some try and error) and extrude cut a hole from the side face 10: Adding fillets to both side faces

Lego man's head

Image
The head structure is not super complicated thus building process was relatively easier than other parts. I started by measuring and recording all the dimensions in an evaluation sketch. 1: revolve a cylinder. 2: Adding another hollow cylinder on the top face The hole was created using circle tool and polygon tool. I drew a 8 sided polygon in a circle then trimmed off the extra lines. I believe this method is easier than sketching each lines individually. 3: extruding another cylinder using the same method at the bottom face. 4. Adding fillets. 5: Adding another fillet on the top 6: Lastly extrude cut a hole at the bottom. Done!

Mid sem intensive: Lego man's torso

Image
The lego man project: creating an assembly of Lego man according to real dimensions of a lego mini figure. I borrowed a policeman lego from Ren and bought a 20$ mechanical Vernier caliper from Super Cheap Auto. The first challenge was to measure the parts: reading the caliper and measuring the parts are tough when the lego man is soooooo small. I noted down the measurements in a simple elevation sketch. I started building the lego man's torso according to Andrew's method: sketching one quarter and then mirroring the part twice. 1: extruding a block from the front plane 2: At this part I realized I missed out a small face at the bottom right corner at first step so I redo everything again to fix that. Then extrude cut to form a the outer wall.  3: Extruding a rectangle at the inside. I put the measurements wrongly at first and realized that when I did step 4 and just couldn't get the 2 parts fit in. Corrected the dimensions later. 4: Extruding ...

Week 8.

Image
Part 1 Using fillets on a block shape. finally succeed on the 6th attempt. I was confused with which face or edge to choose so had some try and error. Also noticed the importance of arrangement of features/fillets in feature manager. Part 2   first I created 2 extruded parts Then extruding a hole and the curve  Lastly adding chamfers and fillets.   Part 3   First extruding 2 parts Then extrude cut 2 holes, upper one using "blind" (10mm) and bottom one using "through all". Then adding a cylinder, fillets and chamfers.   Part 4 Extruded 2 parts: one on front plane and one on top plane. Then adding chamfers and fillets.   Part 5 Using mates according to the brief to make sure all the components are fixed. isometric view Sketching on 3 planes, using pierce relation. Using Loft feature, and the 2 arcs as guides. Then create shell by selecting 2 end planes so the part have...

Week 7.

Image
Part 1 extrude a block insert components and arrange them in an assembly, move and rotate the blocks then using different "mate" relations on different faces. The rotating tools are difficult to use at first, I just couldn't rotate the parts in directions that i want,  it became easier after some practice. creating 3 different part then put them in assembly, using different mates (concentric for the holes, coincident between faces and coincident between planes) so that it is fully defined. At corrugation tab create new explode, n dragging them in place. Create isometric exploded view, adding BOM and balloons, editing the tittle block. Arranging the same parts in different way... Tricky part is to extrude cut a section inside. Couldn't understand the top view initially, able to extrude under Andrew's guide.  Using revolve boss to create the slide  Using 3 mates (concentric mates between 2 faces and 2 planes) to create this as...